 |
 |
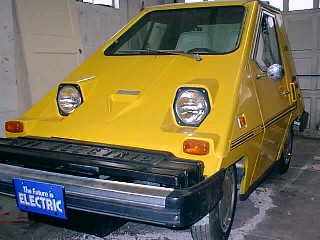
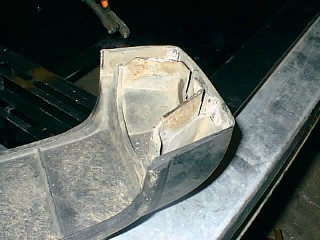
Hi folks, as promised these are the details on my bumper retrofit project. If you are not familiar with the problem, Citicars and Comutacars have funky bumpers made of molded foam rubber over wood. As they age, water saturates the foam and causes the wood to rot. Eventually this causes the bumper to sag into kind of a smile, and then when it gets bad enough, completely fall off. Replacement bumpers are virtually impossible to come by, so a number of interesting solutions have been tried.
On my '75 Citicar, the foam portion of the bumpers was still in good shape, so I simply cut the back of them open with a carpet knife, dug out all the rotten wood, and replaced it with specially cut pieces of pressure treated decking. I then stapled the "incision" closed, and repainted the bumpers with black vinyl paint. They looked as good as new.
I have seen several Citicars on the web wearing cut down VW Rabbit
bumpers. This works especially well, as Rabbit bumpers are simple
polished aluminum extrusions with plastic end caps bolted on. You
simply remove the caps, cut the bumper to length, and reinstall the caps.
This is what I had planned to do on my Comutacar, but when my favorite
salvage yard had no good VW bumpers I went looking for other options.
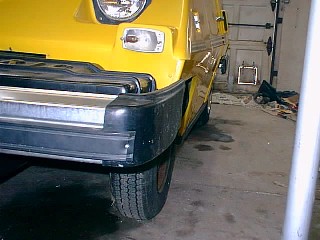
What I found worked very nicely, don't you think?
|
|
|
I picked up two Dodge Omni/Plymouth Horizon sedan bumpers and endcaps. These cars use the same bumper on both ends so you just need to find two nice ones. I had to mix and match parts from three cars to get good ends and good bumpers, and a good front license plate holder. One bumper came with the hydraulic type impact absorbers, the other had the crush type. It doesn't matter which one you use, as they mount exactly the same. I only bought those with mine as I couldn't get the corroded bolts off in the yard. It was a good thing I did as they turned out to be essential to the project.
Here in a nutshell, is how it is done.
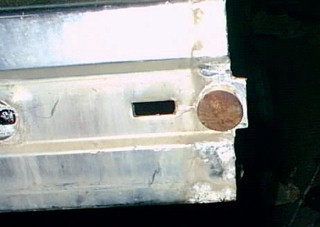
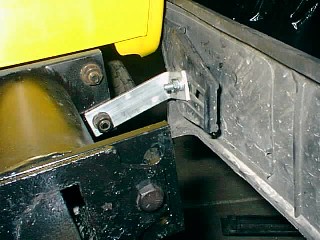
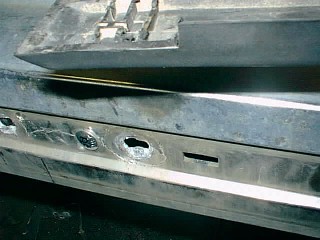
Remove the existing Comutacar bumpers, if anything is left. Remove the existing Comutacar impact absorbers. These will not be reused. Completely disassemble the Omni/Horizon bumpers. This will almost certainly require cutting off some corroded bolts. Using the Omni impact absorbers as a guide, drill the Comutacar bumper extensions to fit the Omni absorbers. On mine I used the hydraulic type absorbers on the back, and the crush type on the front. The front ones had to be shortened to fit as they were too deep for the existing wells. Cut away the outboard ear of the bumper mounting face on the absorbers as seen here.

This is necessary because the mounting ears on the absorbers and the
mounting ears on the endcaps will interfere with each other. Once
you have the ears cut down and the absorbers mounted, it is time to mount
and then cut down the bumpers. I am not including any dimensions
here because of the great variation in Comutacars. What fit mine
may not fit yours. I simply "eyeballed" the position of the endcaps
relative to the body, and shortened the bumper to fit. For mounting
I used "bumper bolts" and large "fender washers".
UNCUT |
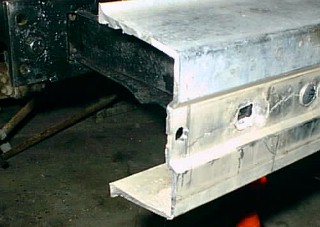
CUT |
You have to cut both ends, as these bumpers are curved and you will
want the trim mounting holes to stay centered. I had to bolt my bumpers
on, measure and mark them, then remove them again for cutting. I
used a 7" carbide blade in my circular saw, and it sliced through them
very quickly. Once you have the bumpers cut down, then the end caps
need to be modified. This is because of the interference problem
with the absorbers.
UNCUT |
CUT |
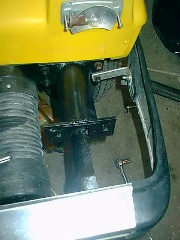
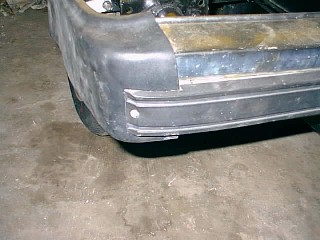
Now, as you might expect, you simply bolt the endcaps on using more
bumper bolts. Take care to get the angle just right. The long free
end of the cap should just overlap the body. To secure it I made
little "L" brackets from 1" aluminum strip.
 |
 |
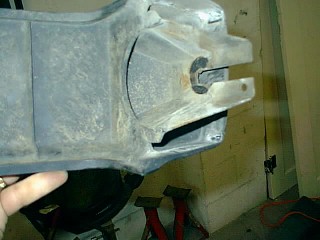
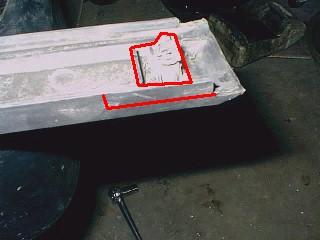
The final step is installing the trim strip across the center of the
bumper. The ends will have to modified as the end caps will now be
covering the original mounting holes. The red line on the uncut picture
shows where the plastic needed to be trimmed away to make the trim strip
fit flush over the end cap.
UNCUT |
CUT |
Once the trim strip is cut down and clipped back into the bumper, the
ends will need to be bent down and attached to the endcaps. I just
used two trim screws I had lying around. The end results should look
something like this.
 |
 |
If you have any questions, feel free to contact me at:
![]()